Onward with New Solar Tech!
We ensure proper planning and preparation when we install a building-integrated photovoltaic technology (BIPV) such as Tesla Solar Roof. From assessing the home to determine cost and installation nuances to getting the site ready for the project start. There are many factors to consider along the way, and understanding the process one follows to get this product on your home is a step forward in helping communities to have more options in renewable energy technologies for homes.
BIPV Review
BIPV is solar photovoltaic (PV) technology that is integral to the structure of a building. Either the exterior fascia or replacing the roof structure, as seen with Tesla Solar Roof. We have partnered with the experienced and genuine PNW roofing company State Roofing to bring this new renewable technology to our Washington community.

Initial Assessment
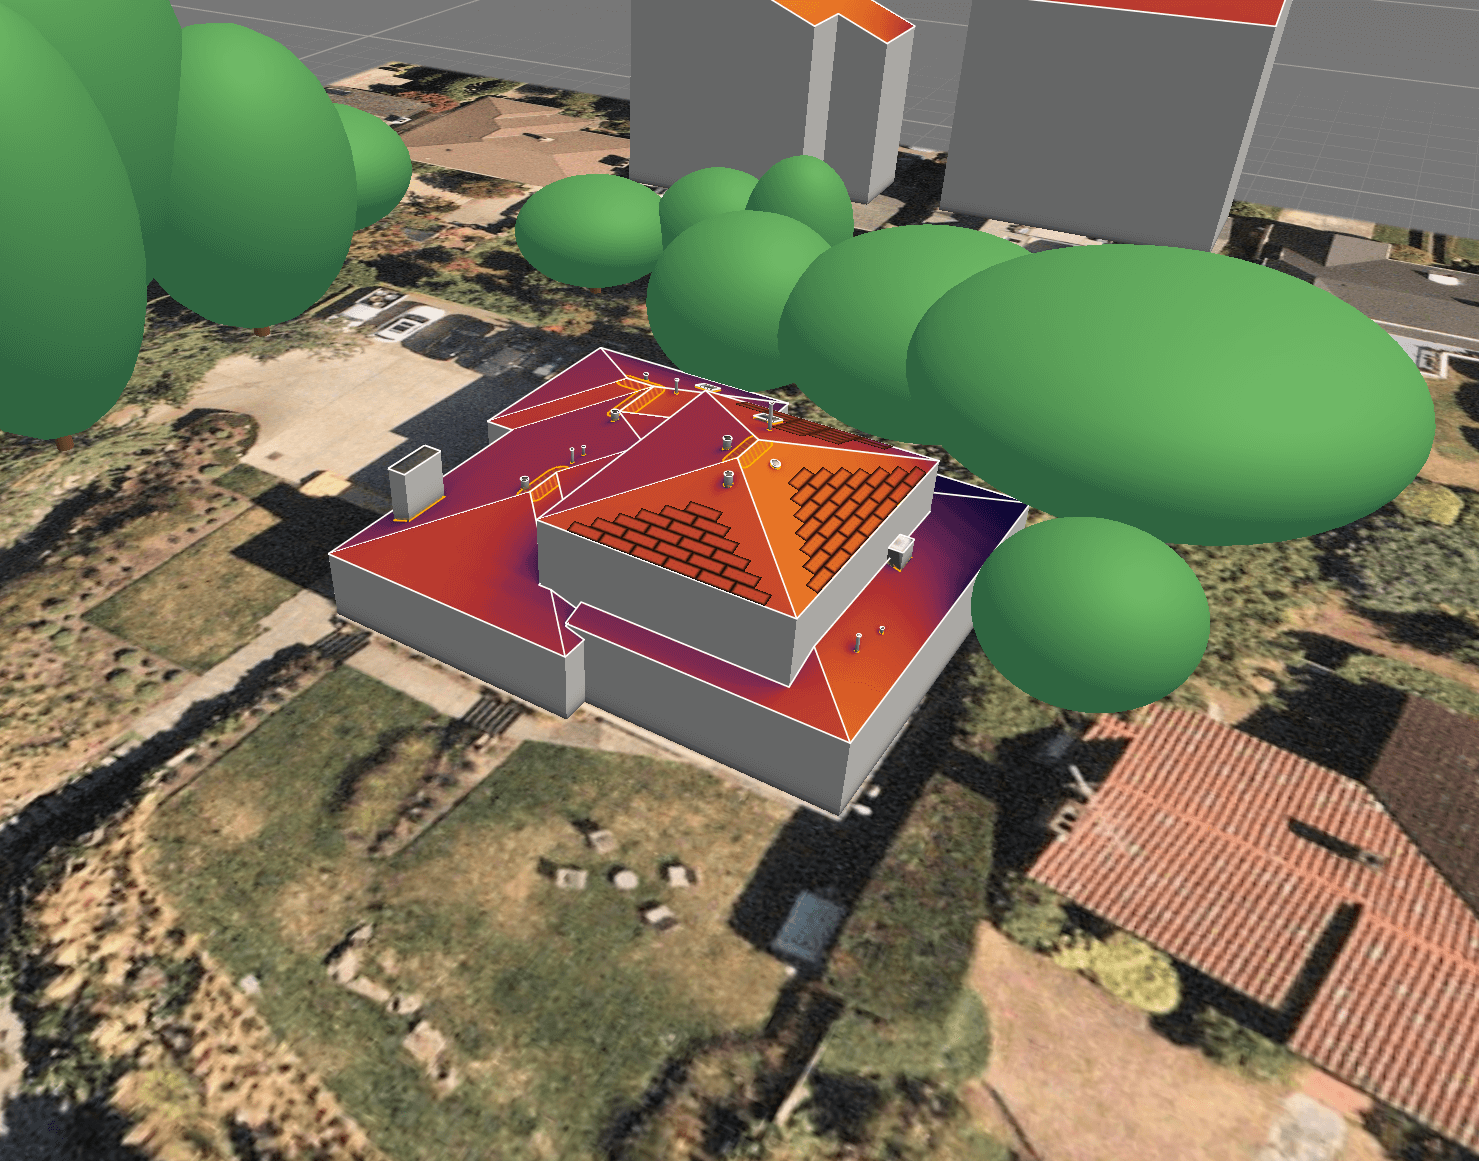
As any solar PV project needs, proper solar access and usable roof space assessment are crucial. Using Aurora’s remote 3D modeling software, we can safely and accurately measure your site’s solar energy generating capacity. Consider any shade from trees or rooftop obstructions to design an optimal array for maximum production! Ultimately, here is where most information will determine the cost of your Tesla Solar Roof or solar panel system.
Further Analysis
We also use Eeagleview to understand the roof planes and obstructions better. This will also determine which mounting planes are eligible for active solar tiles and which ones would remain passive glass tiles.
We will also gather job-site-specific information from the customer, like safety hazards (powerlines, roof accessibility, etc.), accessibility to the site, and how well we can material stage on the site. These are steps to determine the complexity of the installation since Solar Roof jobs come with a lot of material and logistics.
In-depth Assessment
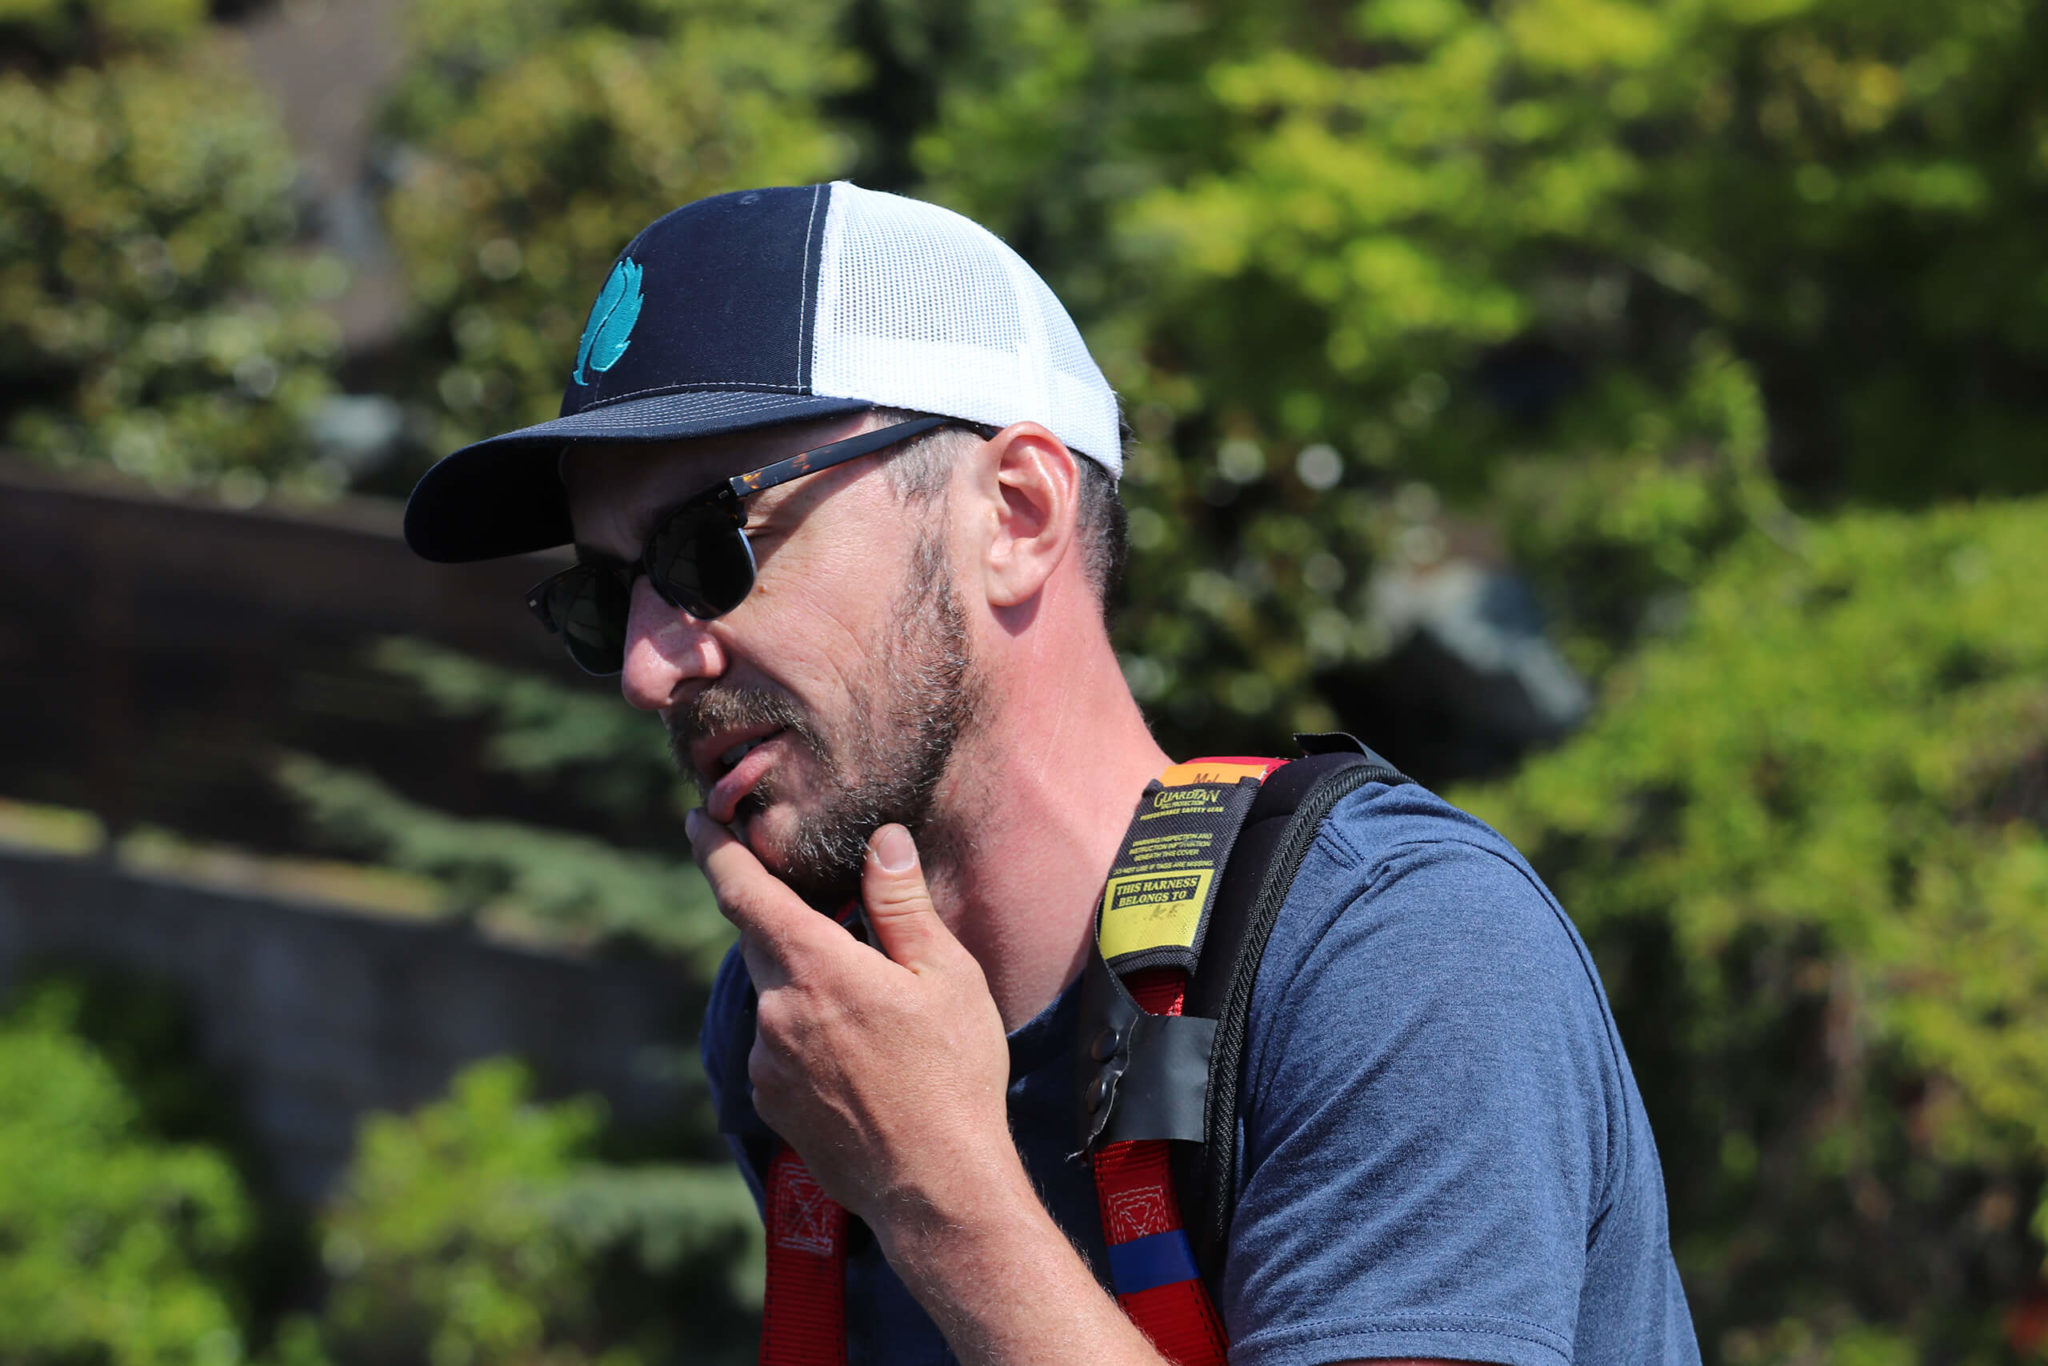
After the initial assessment gives us an idea of the overall installation complexity, we will conduct a physical site survey with an electrician and a roofer on-site. We will inspect the existing electrical layout and the structural integrity of the roof structure and take physical measurements of all obstructions and mounting planes on the roof. The goal is to look for any red flags or upgrades that must be made before installation and determine the house’s eligibility for a Solar Roof.
Installation Process
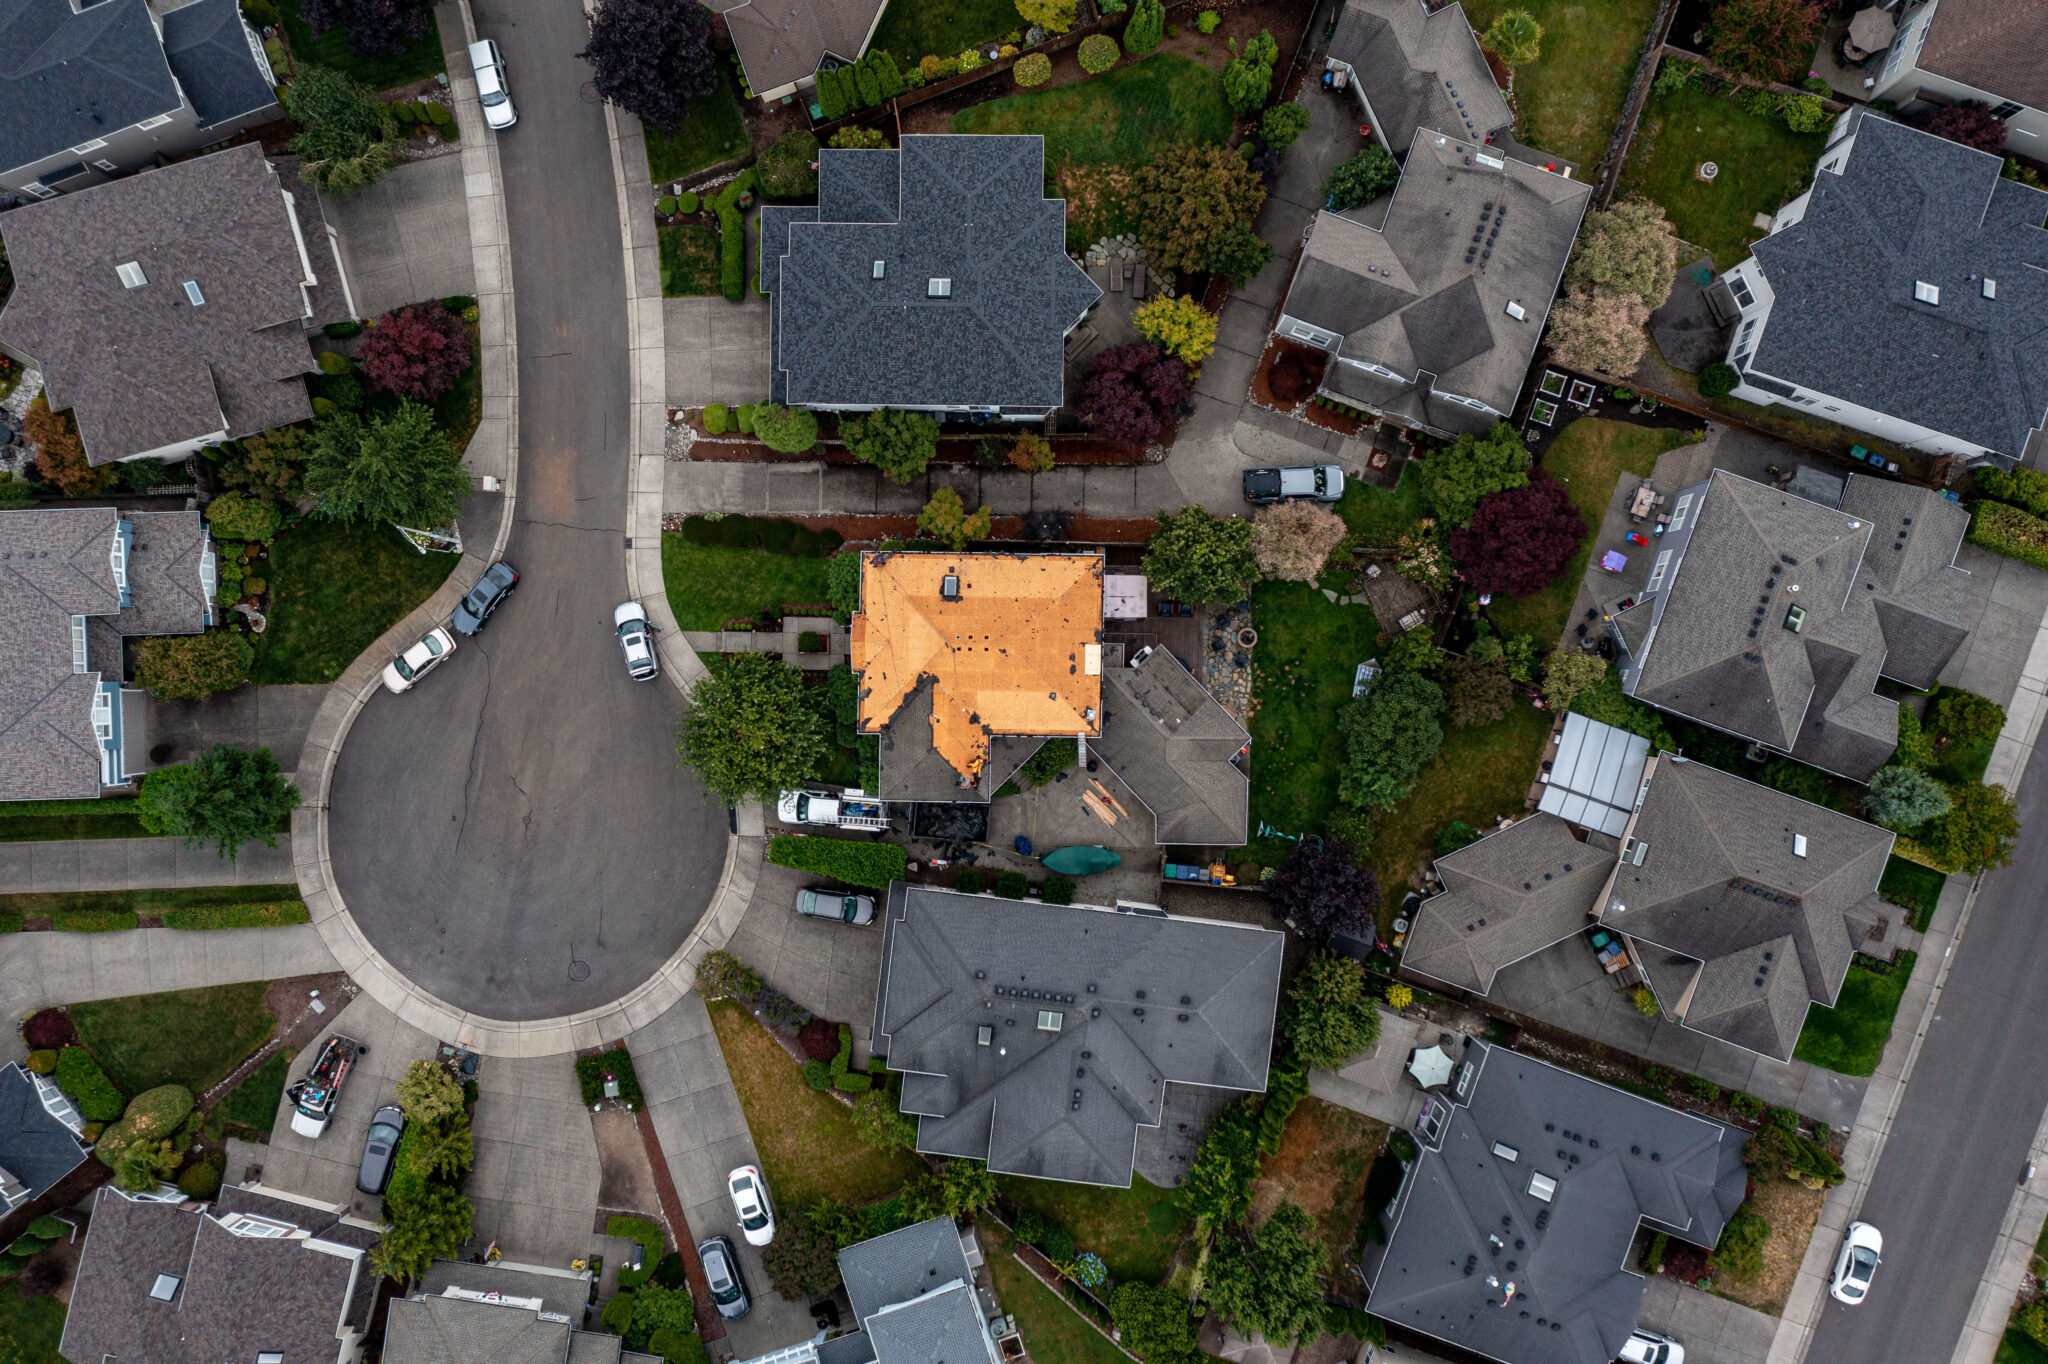
Tear Off
When a Tesla Solar Roof is purchased and there is an existing roof, the first step will be to tear off or remove the existing roofing material. This step will take up the first day or two, as the material removed must be disposed of appropriately and safely. Once the current layer is removed, the decking will undergo any repairs that must match NWES and Tesla’s standards. For example, we want the roofing planes to be as flat as possible for the best aesthetics of the glass tiles. Often we will find things during tear-off that the assessments couldn’t reveal – water damage, broken sheeting, unlevel planes.
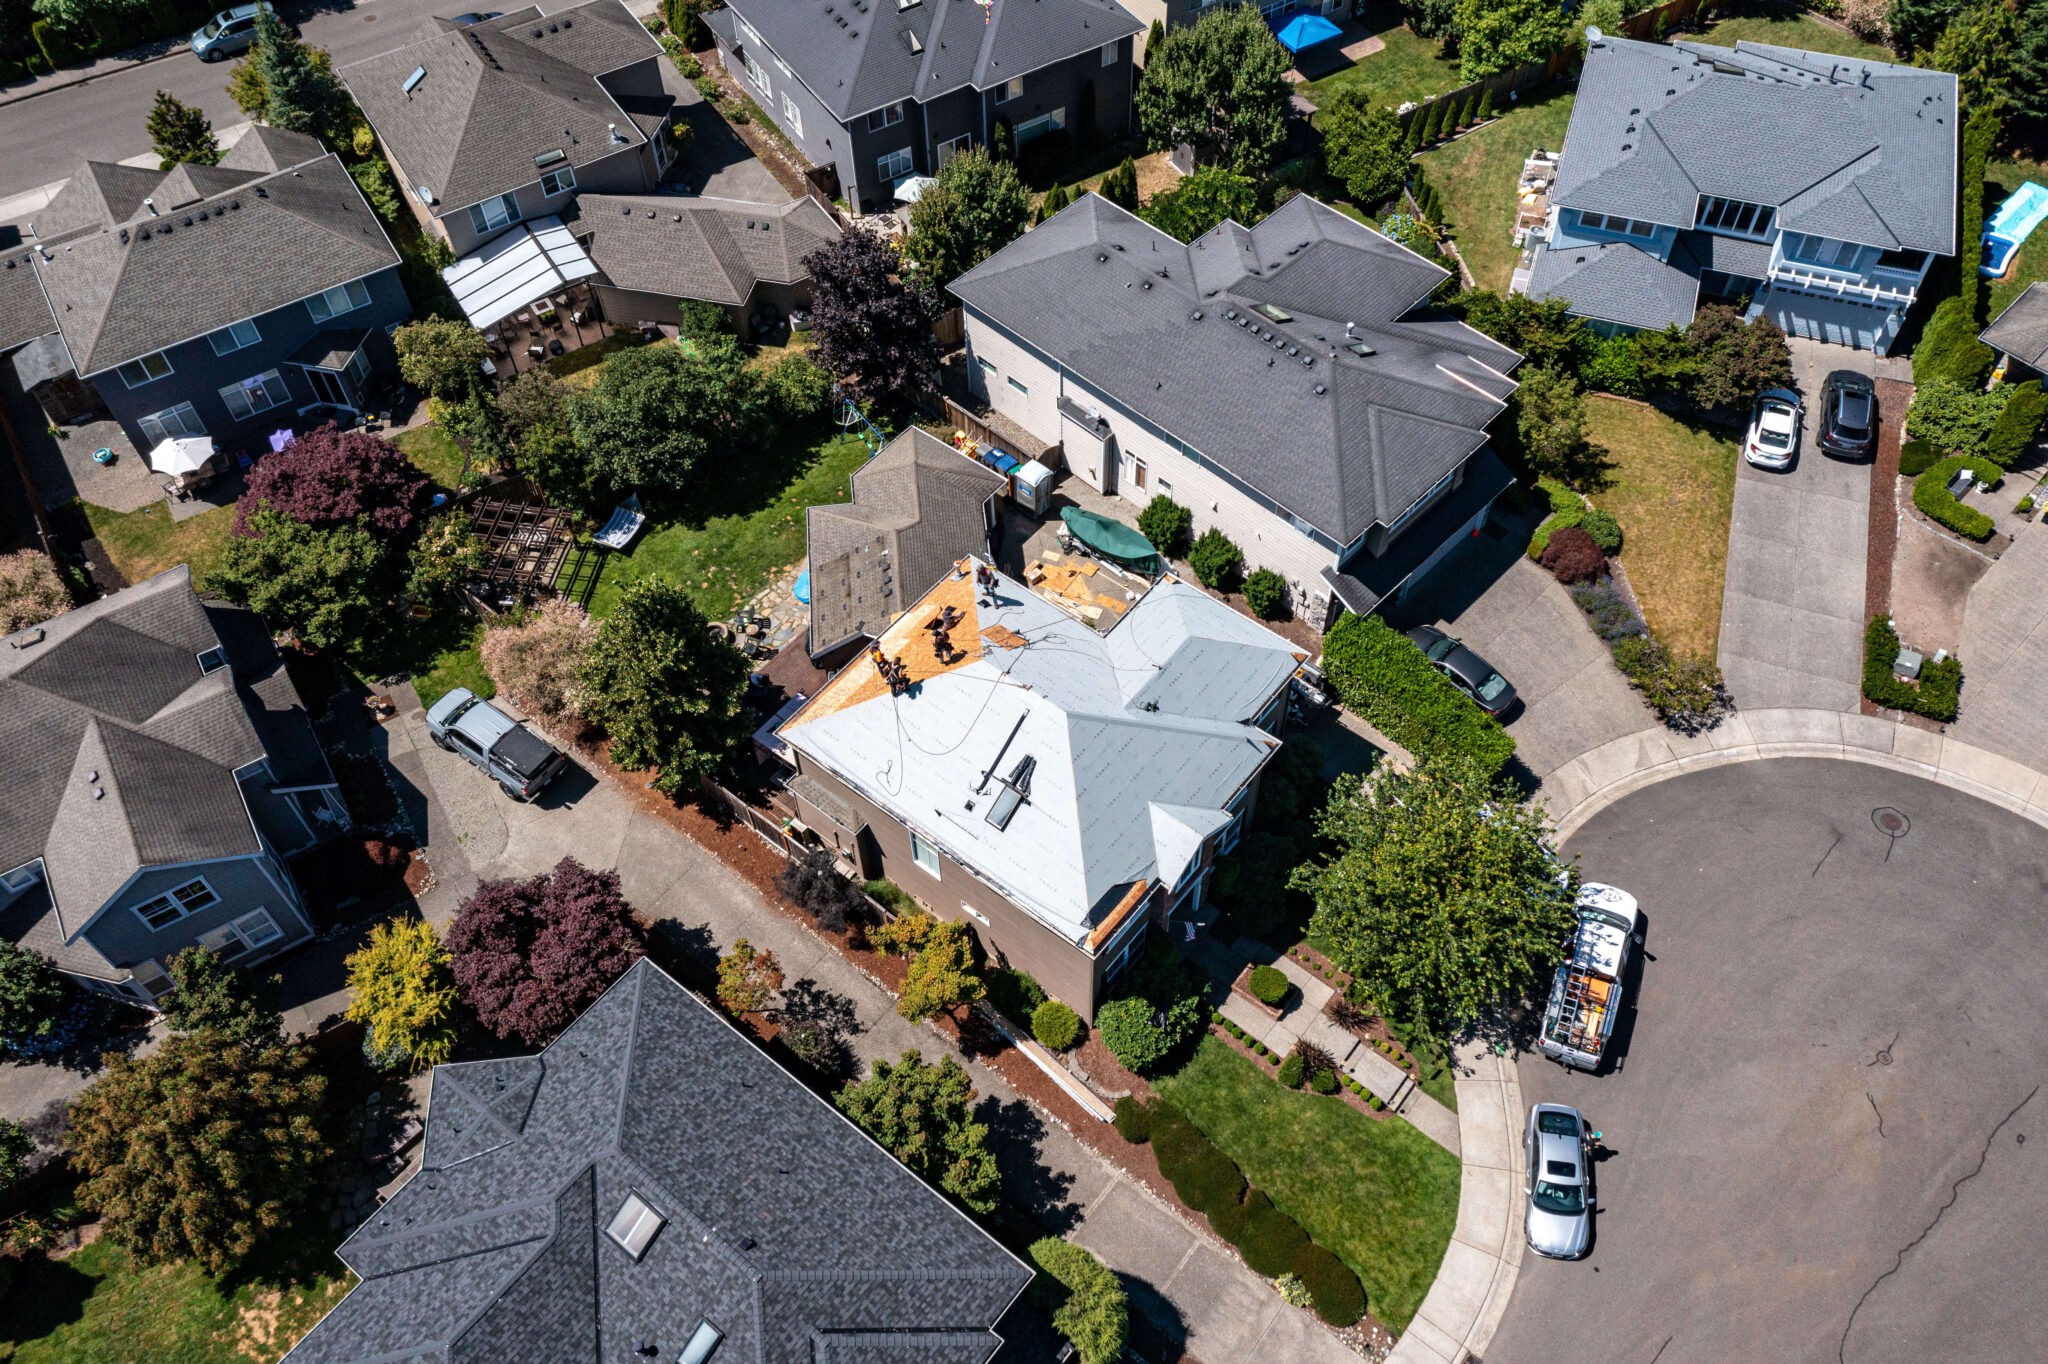
Underlayment
Once the roofing surface is prepared up to the Solar Roof standards, the next would be to add the first layer of waterproofing! Tesla’s proprietary sheathing overlaps from the roof’s eave up to the ridgeline, over the hips and valleys, and around the obstructions. This is the most crucial step in the installation since it protects the house from leaks and water damage.
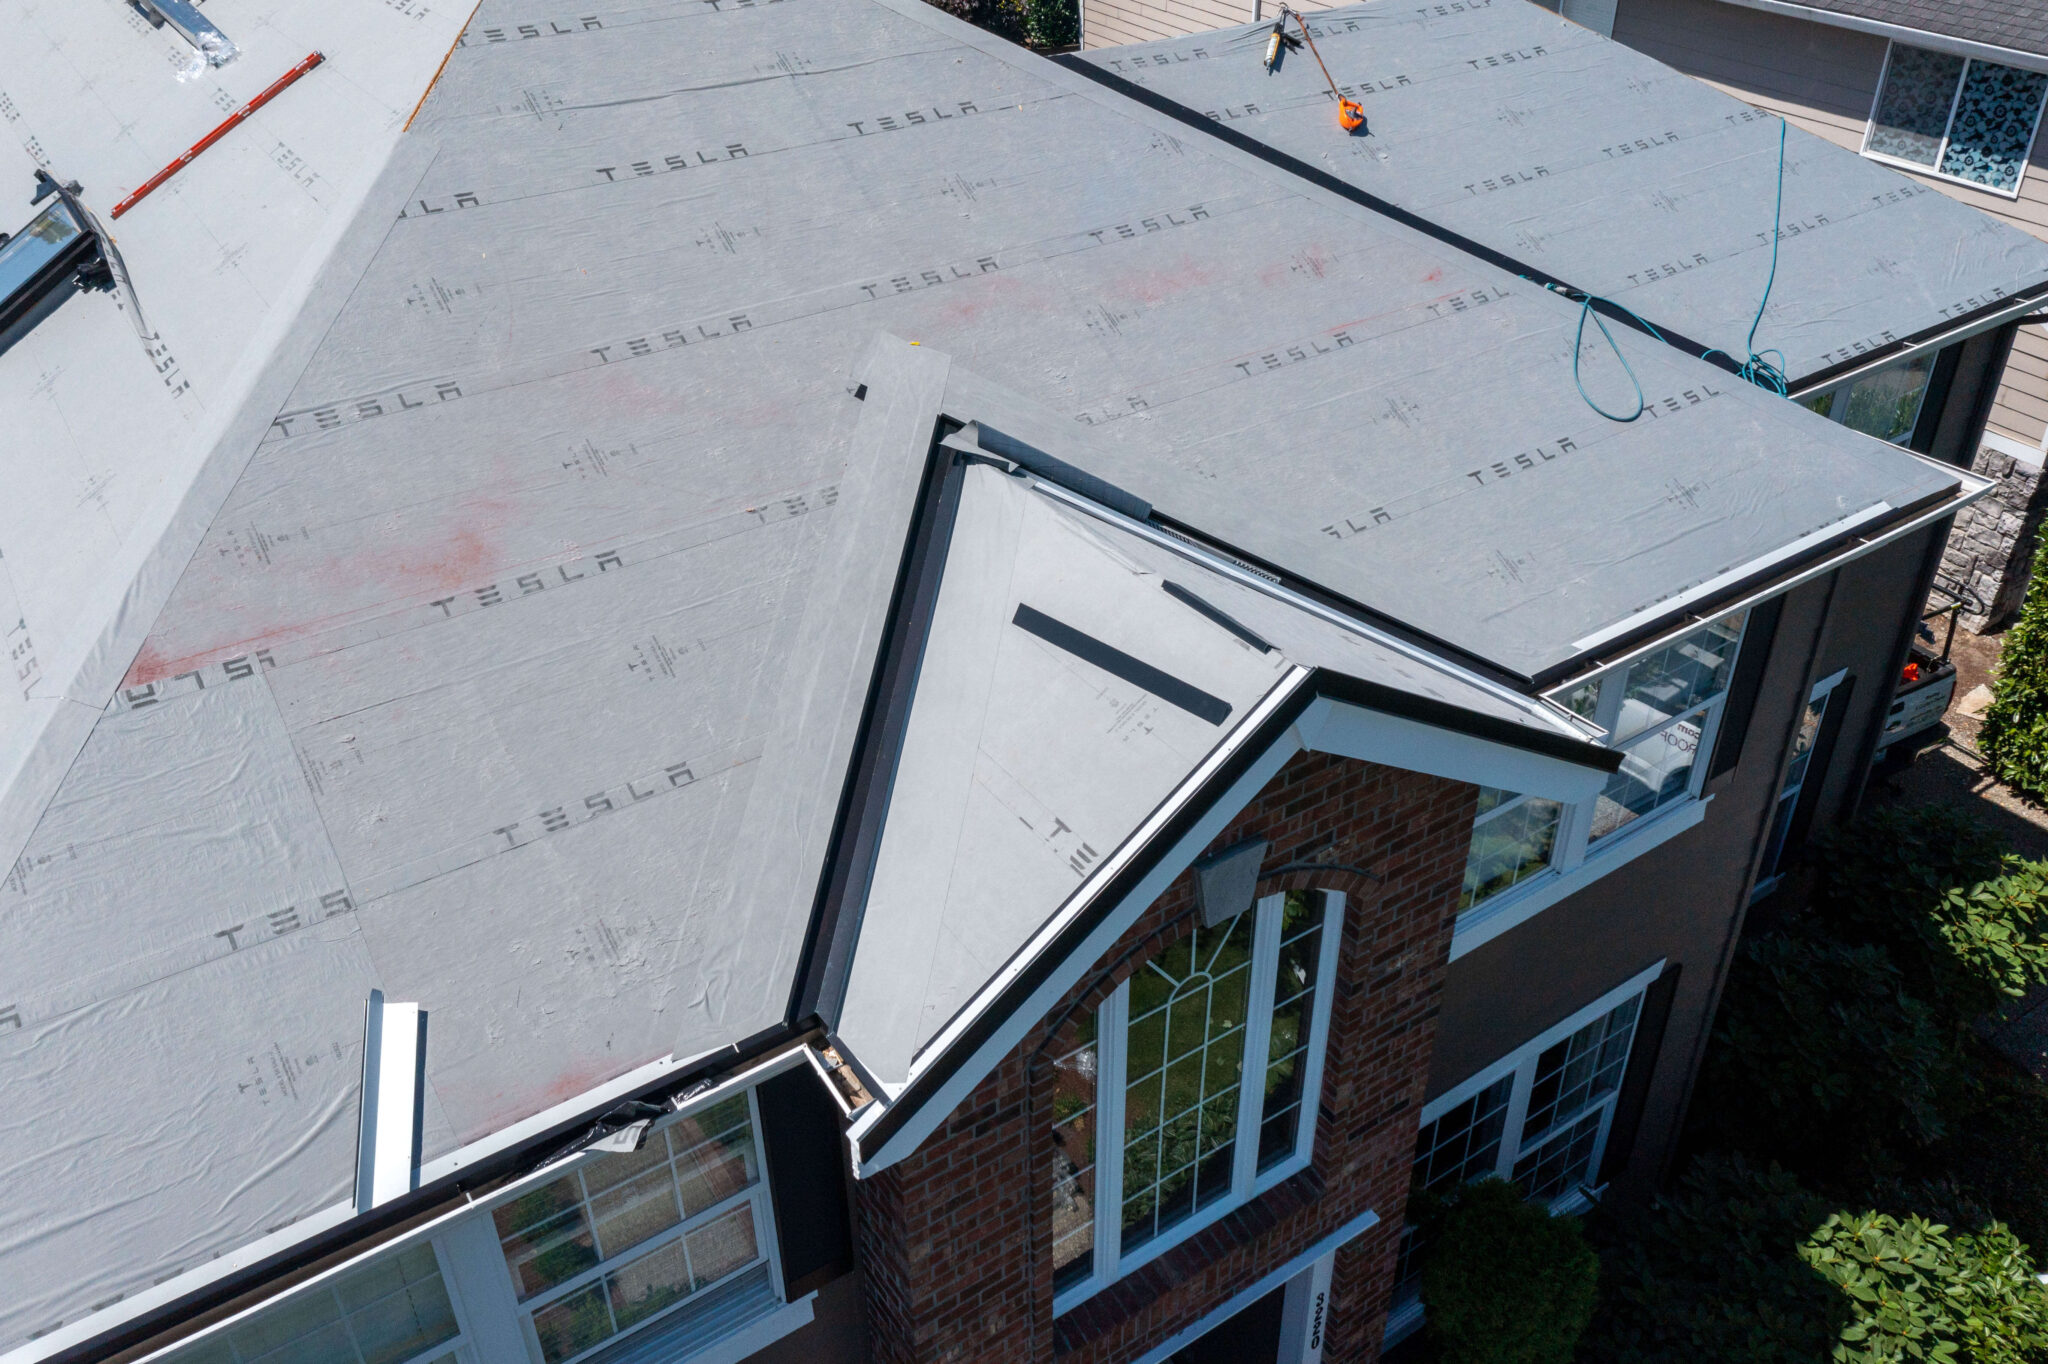
Deck Level Flashing
After the underlayment comes the deck level flashing, such as metal around the edges which helps set the framework for the rest of the tile installation. The deck-level metals sit right on top of the underlayment, and this step must be done correctly to properly weatherproof the foundation for the obstructions and the perimeters of the roof.
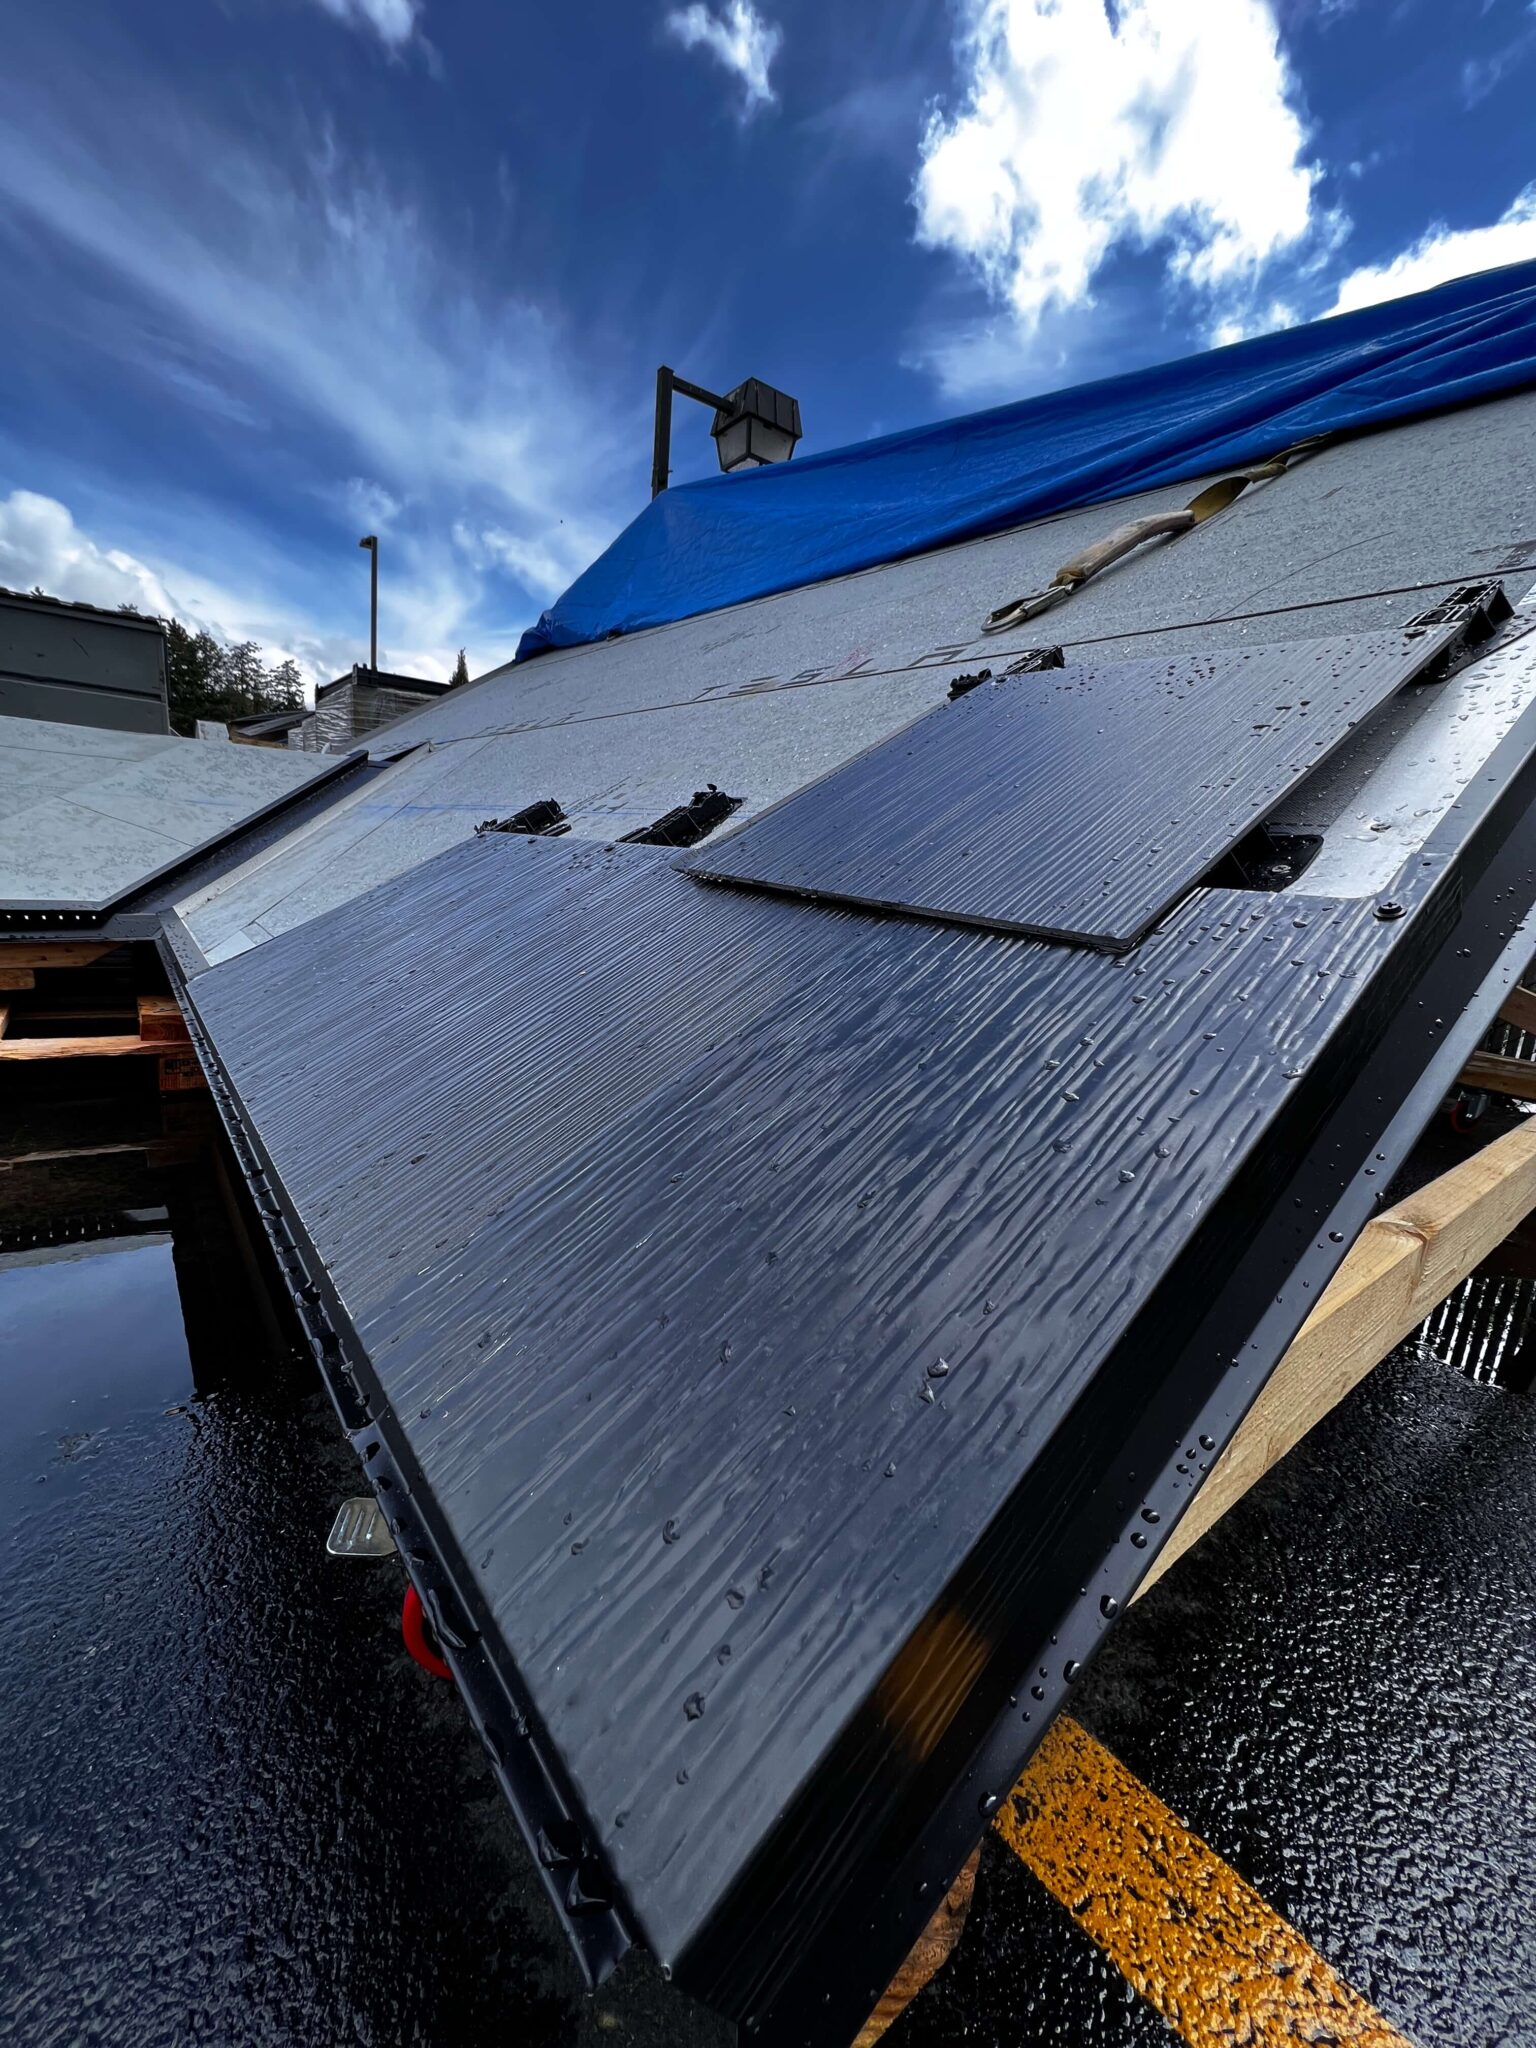
Tiles
With the dry-in and deck level metals completed, black tempered tiles, both energized and non-energized, begin to be placed. This is where the roof aesthetics start to take place – the mounting planes are built with a combination of glass tiles and textured metal. It takes a lot of roofing experience to do this correctly since everything needs to sit flush and level.
Electrical Connection
Electrical wiring takes place during the tile placement as well. The active tiles get wired together underneath the tiles, and the electricians pull the wires down to the inverter using conduit runs and combiner boxes. The attic space and hidden conduit runs should be utilized for excellent aesthetics. It comes down to the roofer’s and electricians’ cooperation to make the installation flow effortlessly and produce the highest quality installation.
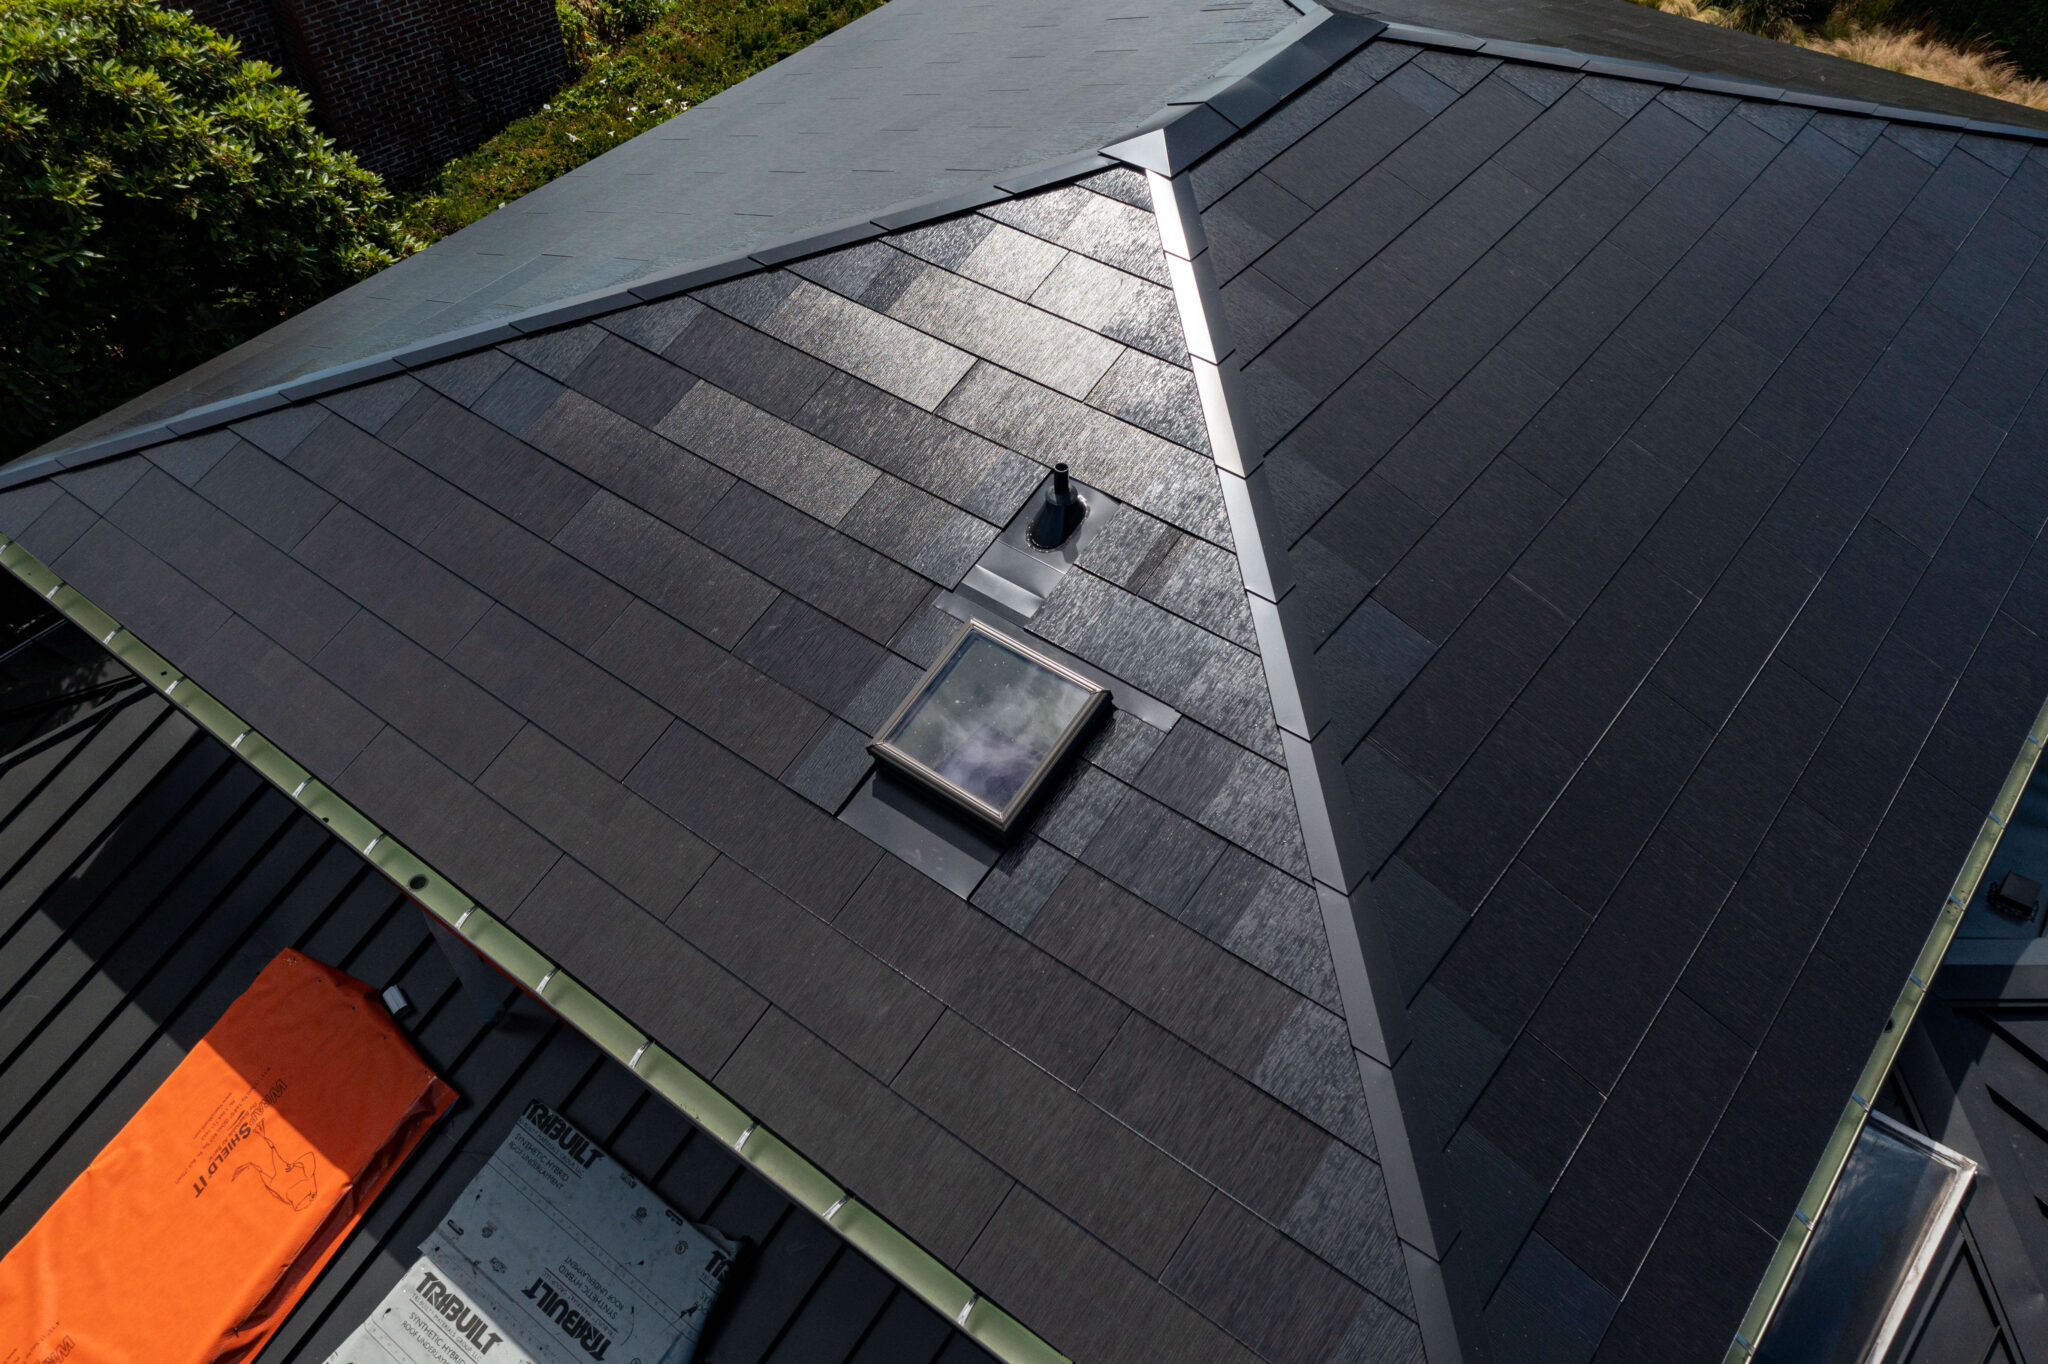
Tiles
As the tiles are being built up and face obstructions, the last portion of the installation is to build tile-level flashings for the obstructions. This integrates the obstructions to the glass tiles aesthetically and brings all the elements together, making the roof look clean. It is often considered the most complex part of the installation – the metal bends can get quite tricky if, for example, multiple obstructions are in the same proximity.
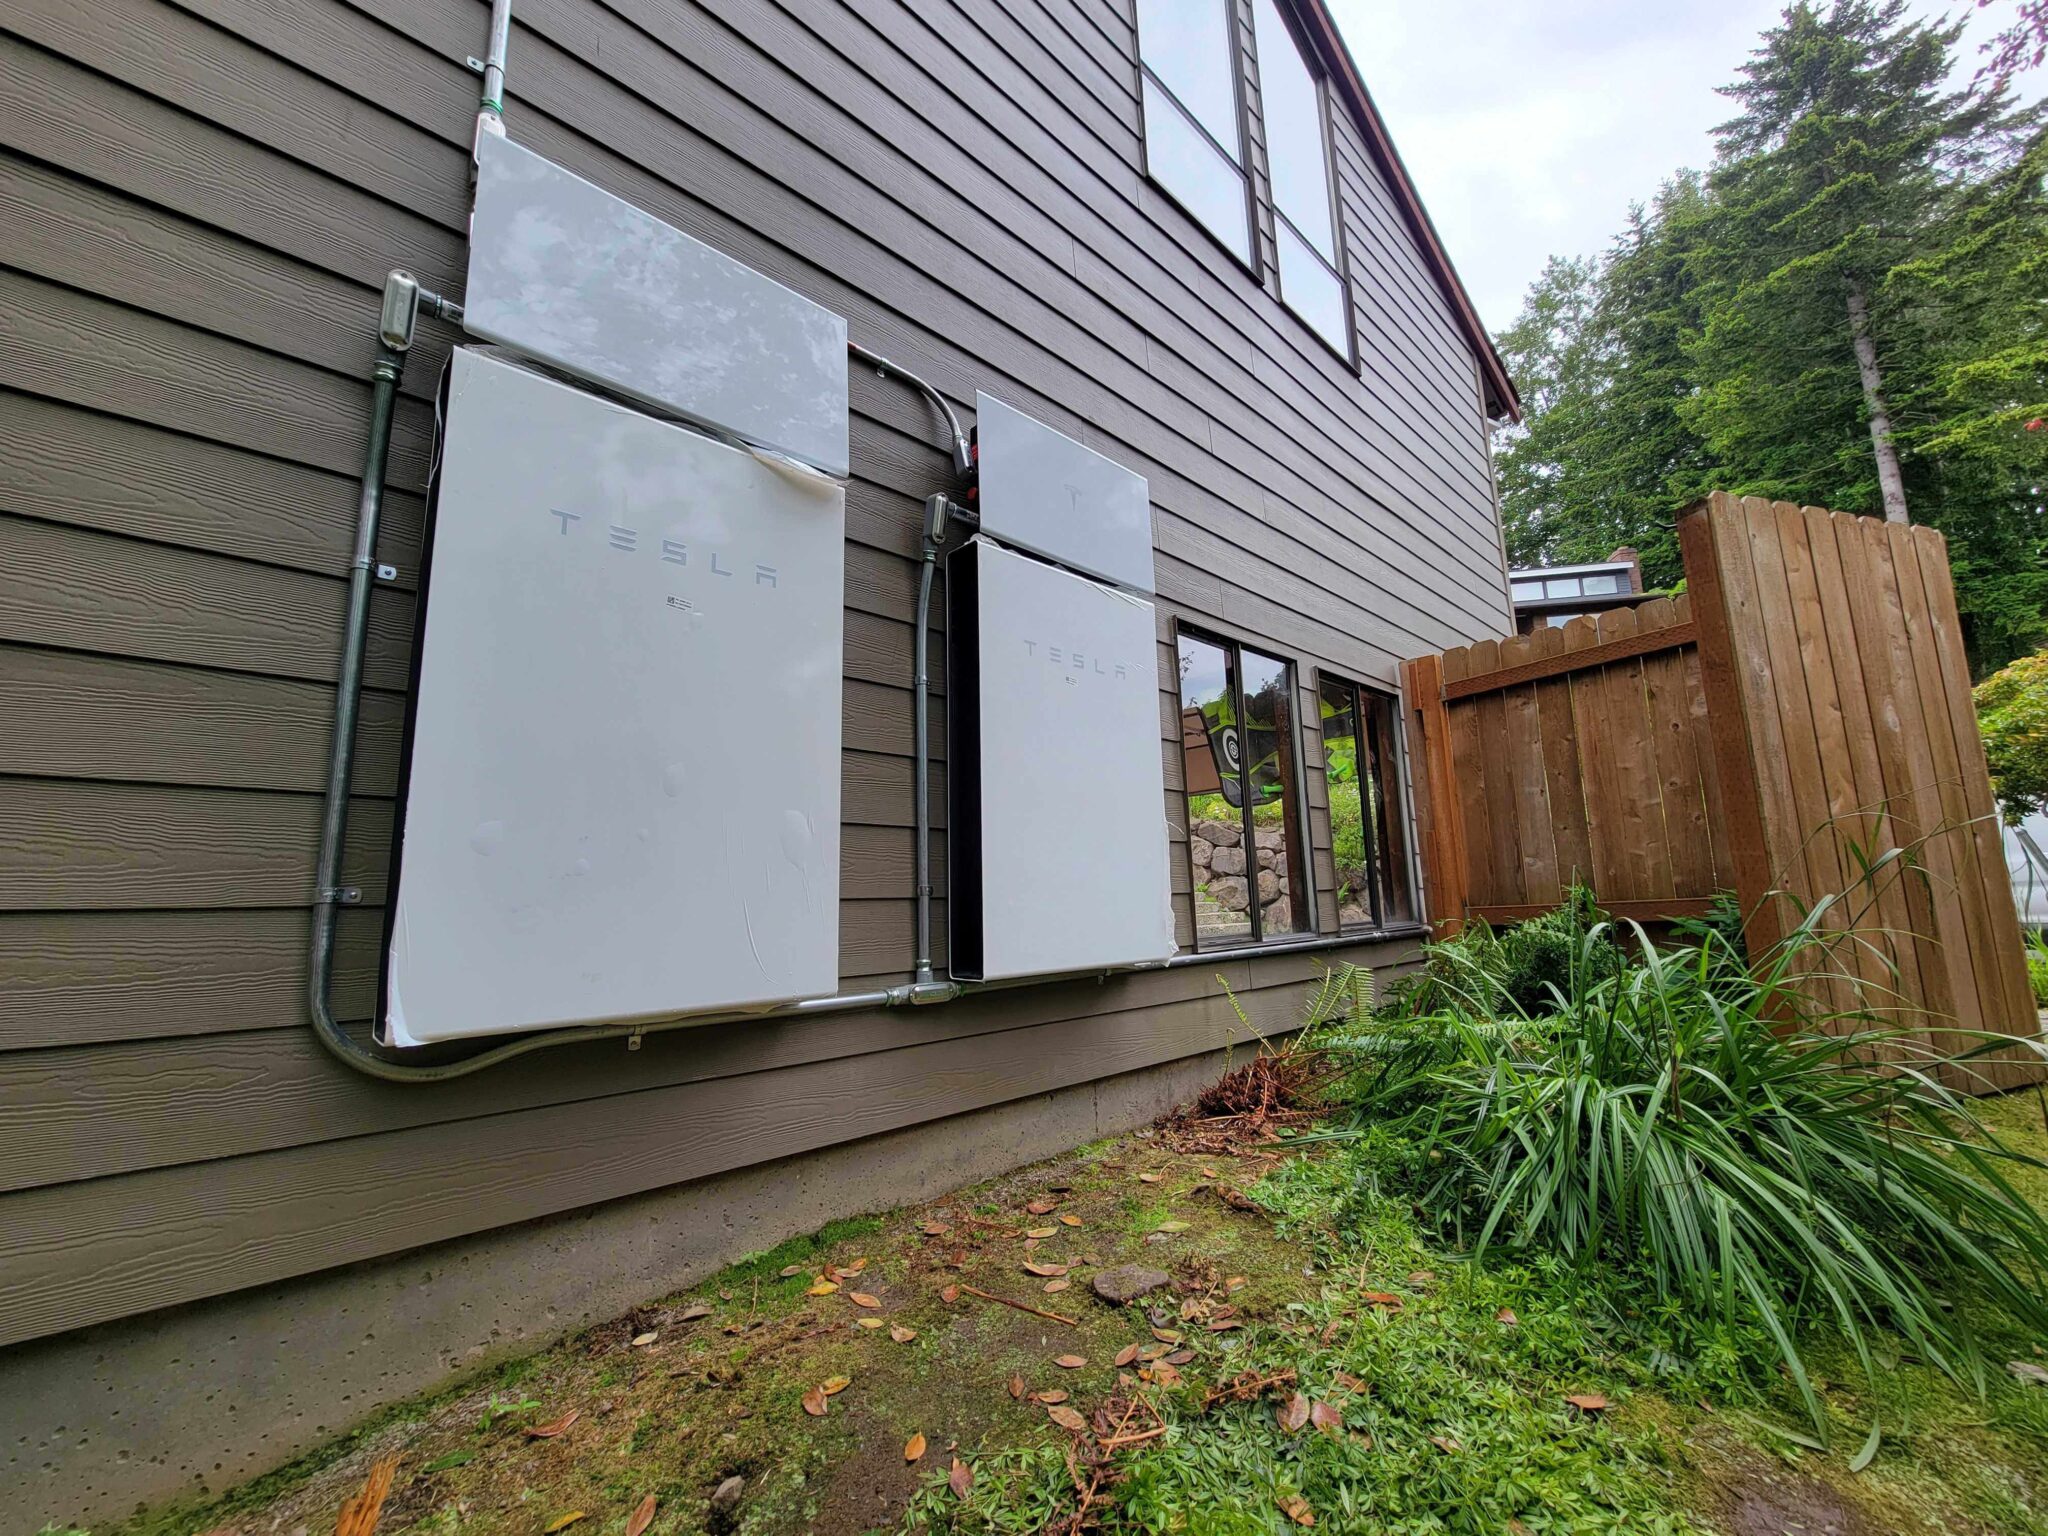
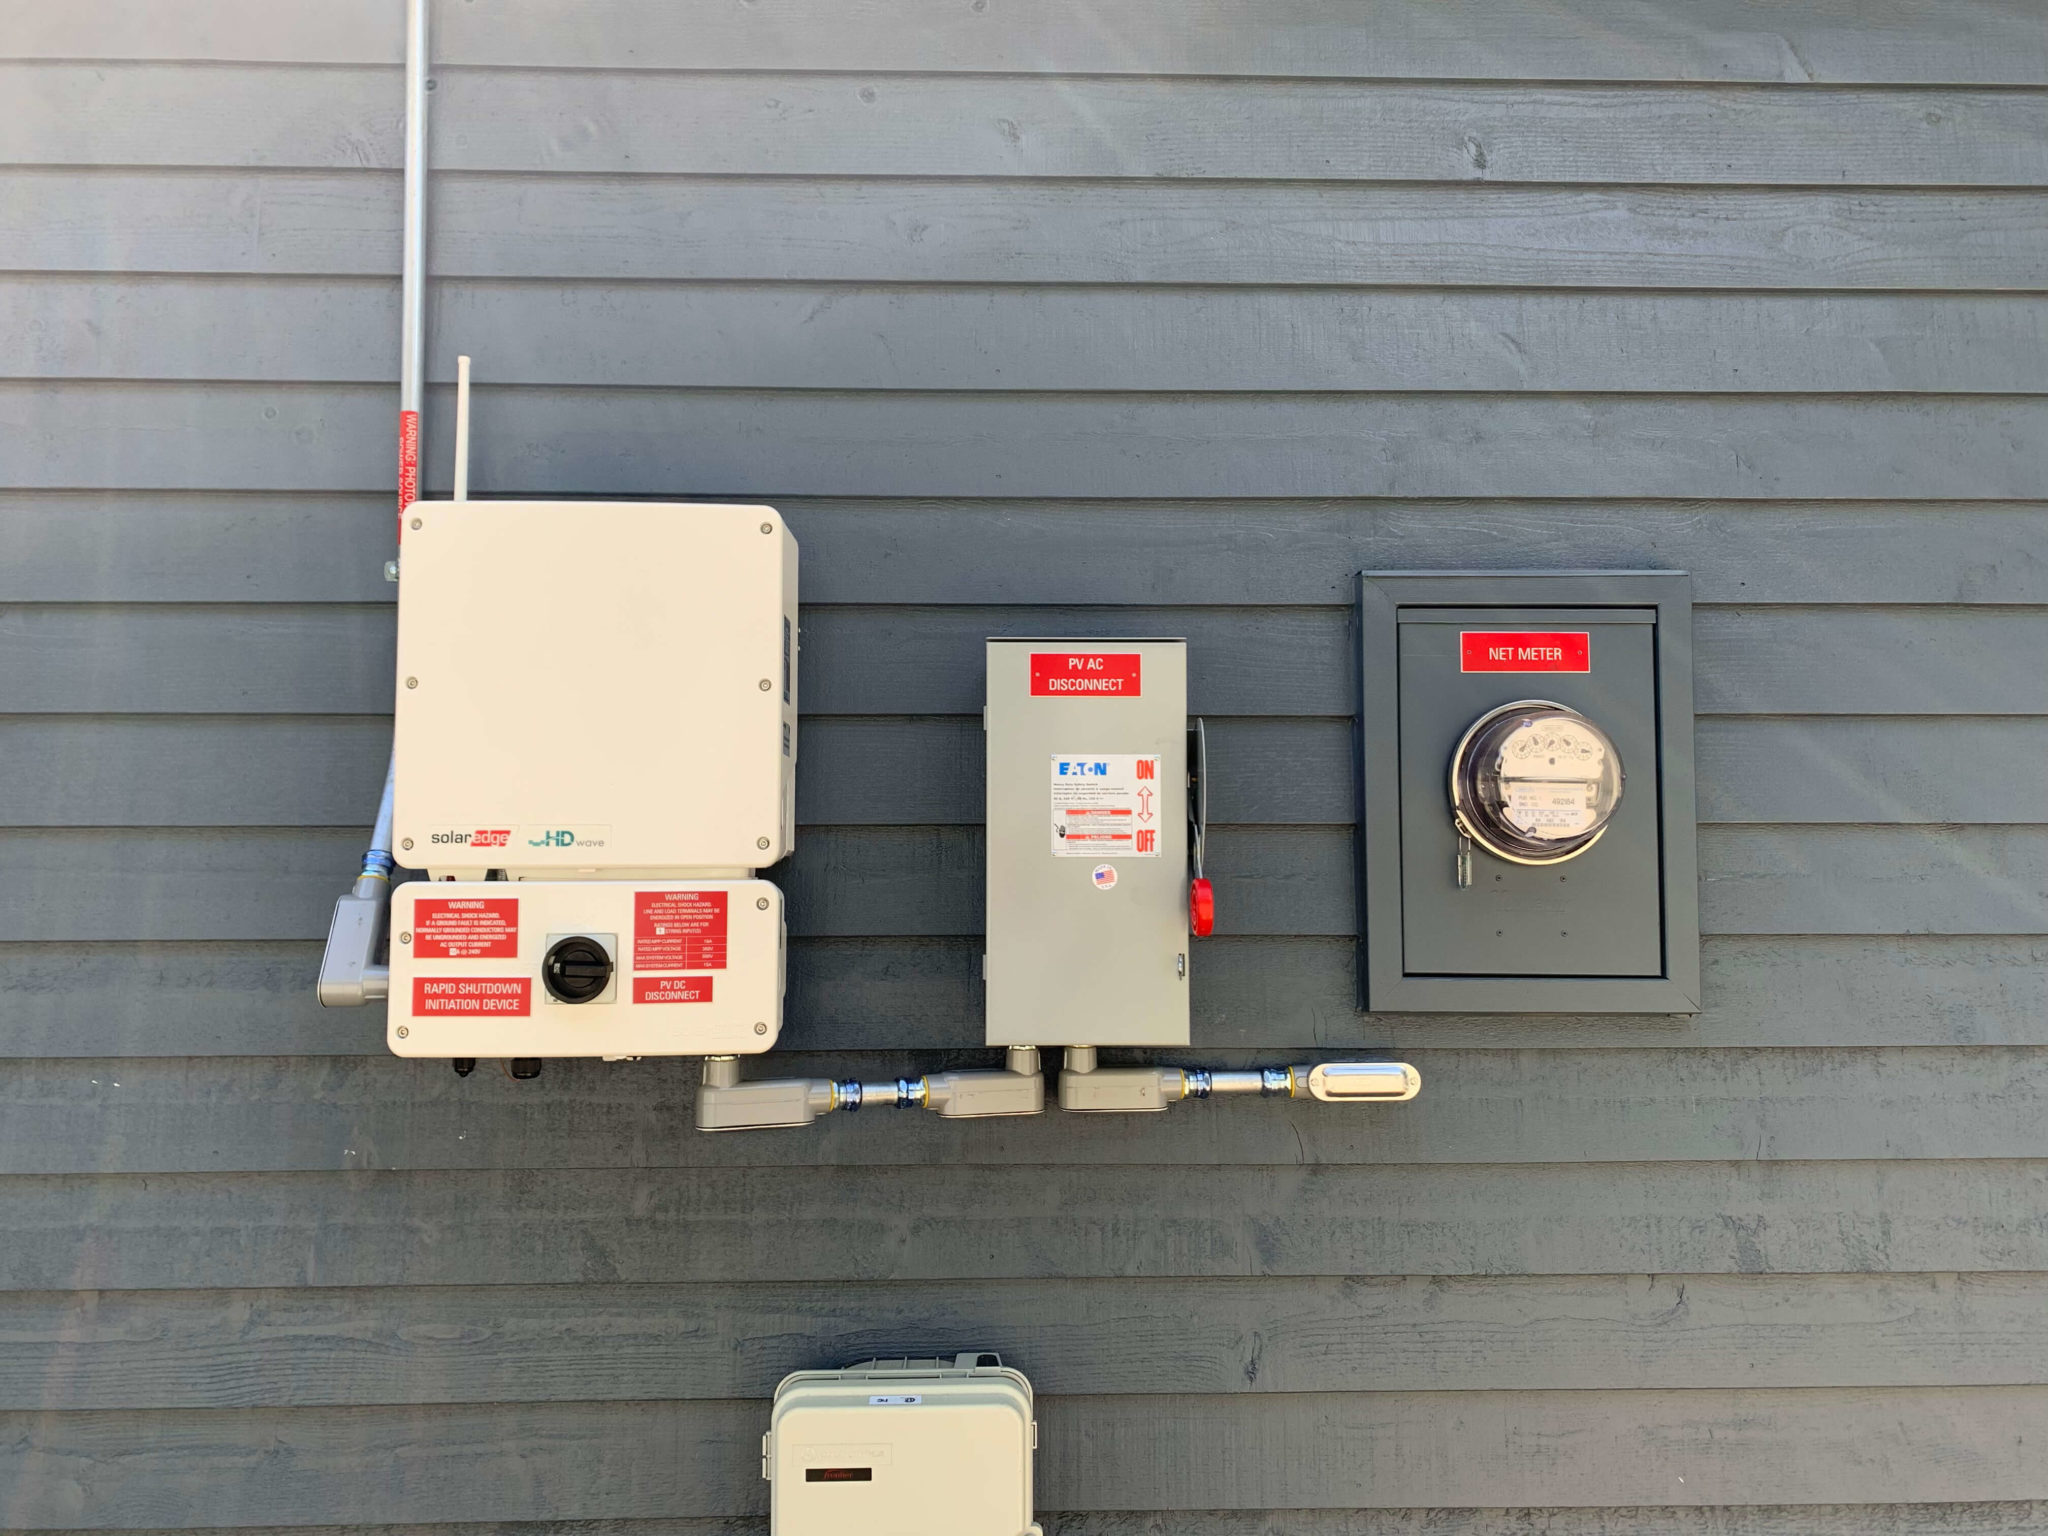
Electrical Downstairs
Depending on the size of the system and if the project involves energy storage systems, the number of electrical components and the way everything ties in together downstairs can vary dramatically. It’s essential to understand all the clearance requirements of the equipment and plan the wiring carefully for the best-looking and most functional outcome. Often this will include removing drywall for hidden wiring, utilizing wiring troughs for clean conduit runs, or exploring all attic spaces for conduit runs. The electricians must follow proper safety standards and inform everyone on site how to act around electrical equipment.
After Installation
Besides enjoying your new gorgeous and functional roof, there will be a couple of ongoing tasks to help you get the most out of your solar PV system.

Maintenance
Unlike traditional solar panels, energized solar tiles don’t have frames that catch debris and cause soiling buildup to affect production. Although it’s a smoother surface that will make it harder for soiling to influence your energy generation, it’s still important to visually inspect your new Tesla Solar Roof for any debris stuck on an area with active tiles.

Monitoring
Maintenance and monitoring go hand in hand. It’s one thing to identify debris and bird poop per se that can affect some output on your activated solar tiles. It’s another to look at your monitoring app and see a sharp decline in energy performance that’s more indicative of an electrical failure. We recommend checking the production of solar energy at least once a week. And in the summer times of Washington, it is more important to monitor the output a couple of times a week because if there is an issue, you want to catch it as early as possible so we can help you get your system running at maximum capacity!
